Showing posts with label rope. Show all posts

Friday, 25 January 2013

Silver tags

Lo so che Natale è appena passato, ma vorrei mostrarvi un progetto che avevo realizzato prima delle feste. Non l'ho pubblicato prima perchè si tratta dei decori che ho usato per i pacchetti regalo... ma in realtà non è un lavoro prettamente natalizio.

I know that Christmas has just passed, but I would like to show you a project that I made before the holidays. I have not posted it before because these are the tags that I used for the gifts... but actually it is a project not just for Christmas.


Si tratta di ornamenti fatti con la pasta di sale
Non chiedetemi la ricetta ufficiale... gli ingredienti sono semplicemente
farina (2 tazze)
sale (1 tazza)
acqua tiepida (1 tazza)
ma partendo dalle dosi indicate ho fatto varie aggiunte fino ad ottenere una consistenza che mi sembrasse adeguata, e ho perso il filo sulle quantità!
Cmq è davvero semplice, quando avete una pasta non appiccicosa simile al pongo ma più porosa vuol dire che ci siete!

They ​​are salt dough ornaments.
Please don't ask the official recipe... the ingredients are
flour (2 cups)
salt (1 cup)
warm water (1 cup)
but starting from these quantity I made various additions until I get a consistency that I felt to be appropriate and I lost the thread on quantity!
Anyway it's really simple, when you have a sticky dough-like clay but more porous means that it is ok!


Poi ho usato stampi per i biscotti per le forme e le lettere sempre a stampino per le scritte: le imperfezioni ci sono e sono visibili, ma mi piacciono proprio così...

Then I used cookie cutters and letter stamps for the words: there are visible imperfections, but I like them...


Li ho fatti asciugare all'aria e non in forno per evitare che si gonfiassero, ma prima ricordatevi di fare un forellino per il nastro... Per l'asciugatura completa calcolate anche 3 giorni, girandoli di tanto in tanto. Infine... colore: io ho usato una vernice argento spray.

I let them dry instead of put into the oven to prevent them puff up, but before remember to make a small hole for the ribbon... The complete drying can take up to three days, remember to turn them occasionally. Finally... colour: I used a silver paint spray.


Facilissimi e d'effetto, sono personalizzabili: parole, auguri, nomi... potete scrivere di tutto, ma anche giocare con la texture e creare righe, fiori, geometrie sulla superficie pressando delicatamente pizzi, stoffe, tutto ciò che trovate in giro per casa.

They are very easy, cute and customizable: words, greetings, names... You can write everything, but also play with the texture and create stripes, flowers, geometrics on the surface by gently pressing laces, fabrics, everything you find around you.




Thursday, 15 November 2012

Ombre tassels

Tralasciando il fatto che da Antropologie comprerei tutto (per fortuna ci sono le tazze!)... a volte mi consolo solo facendoci solo un giretto: vetrine ed allestimenti sempre una bella ispirazione.
Un pò tribale, un pò shabby, un po' vintage e tanto recupero, la mescolanza mi affascina: c'è un equilibrio tra stili diversi che riesce a non degenerare.

Aside from the fact that at Anthropologie I 'd buy everything (thanks for the mugs!) ... Sometimes I just make a ride for my pleasure: the windows and he installations are always a great inspiration.
A bit tribal, a bit shabby, a bit vintage and a lot of recovered stuff, the mix fascinates me: the different styles are always well balanced.


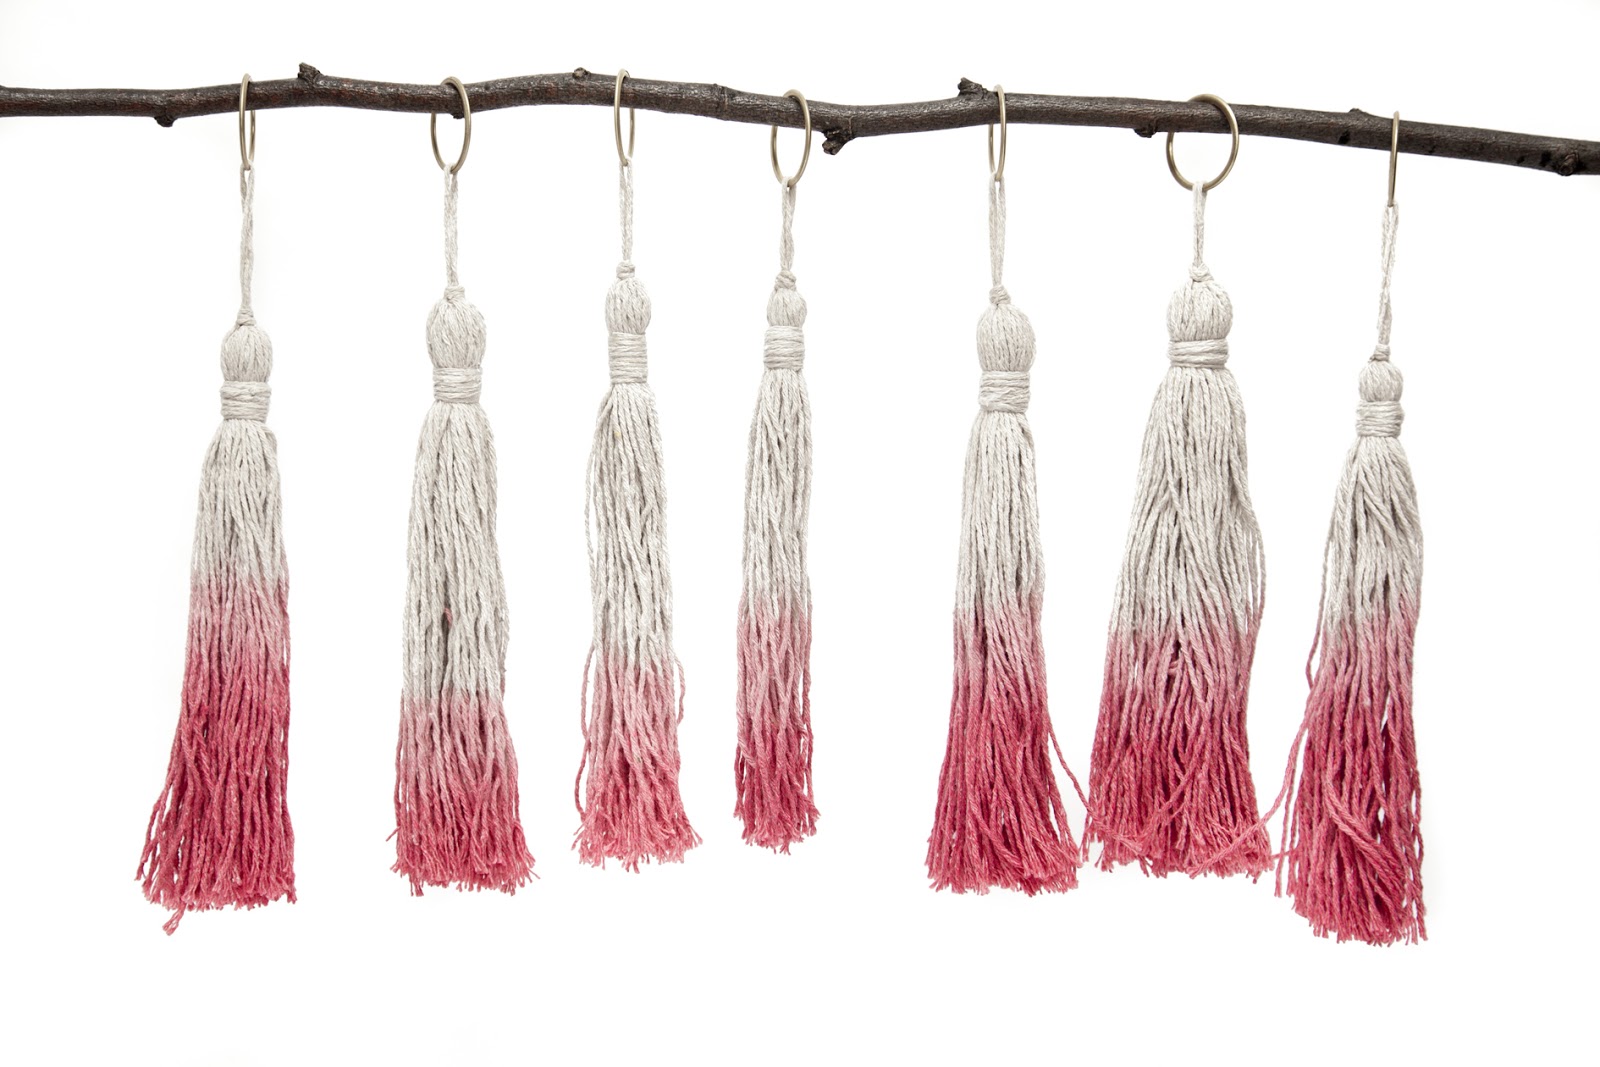
Nel negozio in King's Road sono apparsi enormi addobbi appesi, un po' ghirlande e un po' chandelier, fatti di nappine di spago di corda, e di tulle, nei toni naturali e con un tocco di rosa.
Quindi, ispirata da Antropologie, ecco il mio progetto:

In the shop in King's Road appeared huge hanging decorations, something between garlands and chandeliers, made ​​by tassels done with rope and tulle, in neutral tones with a touch of pink.
So, inspired by Anthropologie, here is my project:


Per immagini i passaggi:
Here are the steps picture by picture:


Più precisamente, per fare le nappine vi consiglio questo tutorial, mentre per la fase di colorazione seguite attentamente le istruzioni sulla confezione del prodotto che usate. 

Alcuni consigli: 
- fate la colorazione all'esterno, il rischio di macchiare è altissimo!
- per ottenere la sfumatura, immergete la parte più alta per poco tempo, mentre lasciate le punte in immersione più a lungo
- alla fine, risciacquate con acqua solo la parte tinta per evitare di che il colore vada anche sulla parte bianca
- lasciate asciugare a lungo...


More precisely, to make the tassels I recommend this tutorial, while for the colouring step follow the instructions on the packaging of the product you use.

A few tips:
- do the second phase outside, the risk of staining is high!
- in order to obtain the gradient, dip the highest part for a short time, while leave the tips in immersion longer
- at the end, rinsed with water only the coloured part to avoid that the colour goes on the white part
- let them dry for a long time...


Ho utilizzato uno spago 100% cotone per essere sicura che la colorazione funzionasse.
I used a 100% cotton string to make sure that the colour works.


Per completare, ho aggiunto un anello e finito le nappine alla maniera classica arrotolando il filo alla sommità.
Then, I added a ring and finished the tassels in the traditional way by rolling the string at the top.


Monday, 31 October 2011

This is Halloween

"This is Halloween, this is Halloween
Halloween, Halloween, Halloween, Halloween"

cantavano le creature di Tim Burton...
Tim Burton's creatures sang...

E quindi, eccoci, oggi è Halloween!
Ecco le nostre zucche (che detto così potrebbe essere frainteso...):
Here we are... today is Halloween!
And here are our pumpkins


Ho realizzato quella dorata semplicemente con carta di giornale, colla e spago verde:
I realized the gold one simply with paper, glue and green rope:


Step 1
fate una bella palla con carta di giornale accartocciata e un pò di colla vinilica a strati. La carta non deve essere troppo compatta, altrimenti non riuscirete più a lavorarla. Arrotolate dello spago, tirandolo in modo da sagomare la pallina a spicchi.
Make a ball with crumpled newspaper and vinyl glue in layers. Pay attention that the paper should not be too compact, otherwise it will be hard to work later. Roll up the string, pulling it to shape the ball into wedges.

... aspettate che la colla asciughi... 
... wait until the glue dries...

Step 2
eliminate lo spago provvisorio.
Remove the provisional string.

Step 3
spray!

Step 4
una volta che anche il colore è asciutto rimettete lo spago nelle scalanature preformate.
Once the color is dry, put back the string into preformed grooves.

Step 5
incollate (con la colla a caldo) il picciolo realizzato sempre con carta di giornale e ricoperto di spago verde.
Glue (with  hot glue) the stem also made with paper and covered by green string.


HAPPY HALLOWEEN!


Friday, 14 October 2011

Table lamp

Buongiorno! Oggi una lampada... tornata a nuova vita
Good morning! Today a renewed table lamp... 

Before

Scovata in un mercatino (come al solito), pagata pochissimissimo da un signore che non vedeva l'ora di tornarsene a casa... affare fatto!
Sembra avere una sua storia, come quella del suo venditore un pò strambo... ma a me piace circondarmi di questi oggetti, magari rinnovandoli con accostamenti inaspettati...

I rooted it out as usual in a sale, I had it for some pocket money from a gentleman who couldn't wait to go home... I've got my deal!
This lamp seems to have its story, as his unusual seller... but I love to have around me such kind of objects, maybe after renewing them by unexpected mix...


Siete curiosi del DOPO?
Are you curious about the AFTER?


After


Thursday, 1 September 2011

Teapot string dispenser

Bentornati!!!
Welcome back!!!


Oggi, per ricominciare, qualcosa di semplice... ma utile e d'effetto!
Avete in giro spaghi e cordoncini, magari in disordine e attorcigliati?
Ecco come organizzarli...

Today, to start again, something simple but useful and impressive!
Do you have to organize twisted strings and twines?
Here is the solution...


Si possono acquistare dei dispenser...  più o meno carini... sono barattoli con un foro in cima:
You can buy a string box... more or less pretty... they are tins with a hole on the top:

Example

Mi sono chiesta... cosa ho in casa con le stesse caratteristiche?
I wondered... what do I have at home with the same characteristics?

Et voilà:

Teapot string dispenser

In questo modo quando servono sono pronti all'uso, si srotolano senza mai annodarsi e sono anche belli da vedere!
In this way the strings are ready to be used, they unwind easily and they are also pleasant to see!


Friday, 5 August 2011

Love

Questa volta, con uno spago diverso... una scritta... LOVE!
Il colore non poteva che essere rosso!


Today, with a different string... a word... LOVE!
Obviously the color is red!


Lo spago è un pò più rigido di quello normale, così è più facile modellare la scritta.
This string is more stiff then the normal one, so it is easier to model the letters togheter.


Buon weekend, alla prossima settimana!
Have a nice weekend, see you next week!


Monday, 1 August 2011

Lettere di corda / String letters

Good Monday!!

Avete presente le lettere di legno o metallo, antiche, invecchiate o moderne, che si trovano in giro?
Credo siano nate per i bambini e le loro camerette, o per le insegne, ma ora si trovano sempre più spesso in salotto, sulle librerie...
Alcune sono proprio belle... ma a mio avviso hanno prezzi un pò altini...

Do you have in mind those wood or metal letters, old, ancient or modern, that are easy to find around?
I think they are originally born for children rooms, or as signs, but now you can find them more and more frequent in the living room, on the bookshelves...
Some of them are really pretty... but in my opinion they are too expensive...


Ho provato a farle... con fil di ferro come sostegno, spago grezzo e tanta tanta pazienza!
Il sostegno deve essere abbastanza rigido, così possono poi essere appese.

So I have tried to make them... with wire for support, raw string and a lot of patience!
The support has to be quite stiff, if you want to hang them up on the wall.


Do you like them?


Dimenticavo... le lettere sono ovviamente puramente casuali...!!
Oh... I nearly forgot... the letters shown are of course purely accidental...!!


Related Posts Plugin for WordPress, Blogger...